|
Overview:
Just because it is freezing outside and daylight is the shortest during the winter doesn't necessarily
mean that you can not enjoy yourself immensely with snowshoes, a camera and a lunch. Each season brings
 different On-The-Go (OTG) Photography opportunities... and winter is no exception. No matter how many times you have hiked the same trail, it is completely different in the winter. With a newly fallen blanket of snow and very few people to pass on the trails, it is an extremely quiet and peaceful experience. You don't have to go far. Just park your car and snowshoe 200 feet into the woods and you will be surrounded with OTG Snowshoeing Photography opportunities.
Obviously, the best time for OTG Snowshoe Photography is in the morning after a light, dry powdered snow has fallen. The snow will easily blow off your pack, clothes and gear since it does not melt fast and it is feather light.
Getting Started:
To get started, you must learn about "What To Wear Snowshoeing" or "What To Bring Snowshoeing". Study those sections carefully to make sure you have the right clothing and gear. Next, if you don't own snowshoes, find a retailer who will rent snowshoes and poles for the day or over the weekend. Make sure the rental fee will be applied toward a purchase if you decide to buy snowshoes and poles. You might want to familiarize yourself on some of the specifications of snowshoes by reading "The MSR Ascent Snowshoe" if you intend to purchase. Finally, read "Snowshoeing Hints & Tips" for helpful information on how to navigate around with snowshoes on your feet.
On-The-Go (OTG) Photography:
The first questions you might ask yourself are: "How much camera equipment am I going to bring along and how much do I really need?" You must realize that in a snow environment, there is usually no place to place camera gear down where it is not wet or potentially wet. So, you must bring along a small plastic sheet to place on the snow so you can place your pack or camera equipment down to remain dry. This might be the time to think of "Travel Light & Travel Simply." It might be interesting for you to try that technique with snowshoeing. Instead of using my camera belt, I attach the monopod, the monopod pouch, the multi-purpose compact tripod and my camera pack to my fanny pack. All the equipment rests comfortably next to my jacket and it does not interfere with the forward and back motion of my poles. That is the method I prefer to use when I am snowshoeing. Sometimes I even wear a fisherman's cap, the one with a large front brim. This protects the camera from any falling snow from the trees when I am taking photographs.
OTG Snowshoe Photography Opportunities:
Snowshoeing will provide many snowshoeing photography opportunities. With newly fallen snow, you
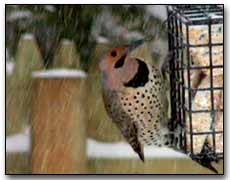 have the advantage of easily finding wildlife tracks and an occasional wildlife den. Look around for frozen streams, small or large waterfalls, icicles, frozen trees, half frozen streams with running water and snow covered rocks, snowdrifts, wildlife, frozen rock cliffs and all the other great wonders of winter. If you are fortunate to have Canada Geese or Mallards in a half frozen lake during the early morning or late afternoon, it will give you some winter photography opportunities. The body language of wildlife is completely different from their body language during the warmer months. If you happen to see wildlife such as deer, red fox, coyote, etc. be ready for that "In-The-Moment Photography" opportunity. Using longer shutter speeds during falling snow will add a nice touch to photographs and adding a warming filter will give the photograph an old-time look.
Monopod Or Tripod Snowshoe Support
If you are going to use a tripod or a monopod, you might need to add homemade snowshoes for the feet. At the hardware store, purchase 1 or 3 round, rubber furniture leg tips that are used to protect floors (they must fit snug on your monopod or tripod leg). In the plumbing section, purchase the same number of 4" circular, flat, plastic test caps for pipes (any circular flexible plastic piece will work fine). Drill a whole through the center of the test caps and also through the bottom of the furniture leg tips. Attach the rubber leg tip to the center of the pipe cap with a screw and a bolt. Press the rubber tip on the monopod or tripod leg with the plastic test cap on the bottom. The plastic test cap will now sit flat on the ground when the tripod or monopod is opened. This will act similarly to a snowshoe as it will support the monopod or tripod on the snow. If you don't feel like making a snowshoe support, another idea is just to pack 1-3 Frisbees and place them under each leg. You will also have to cover your tripod or monopod with foam insulation to help keep your hands warm when you handle your tripod. I have not had to add foam insulation to my monopod as it is so light that it does not make my hands cold through my gloves.
Snow Photography:
The rule of snow photography is very simple. "Most of your photographs will probably turn out too dark with possibly with a shade of blue, if you let your meter be your guide." There is also an old saying, "If it is bright, add light." Remember, without side lighting, there are no shadows in snow to cause textures. If you photograph snow on an overcast flat day, all you will get is a dull, light-gray photograph... no matter what you do. You can carry gray paper and meter off the paper to get a correct exposure or you can meter off of something neutral in the photograph such as a rock or tree.
Another Approach:
1) If the snow is pure white, meter the pure white area only with spot-metering. You will not see any detail in the snow. Open up 2 stops.
2) If the snow is side lit and you see a lot of detail in the snow, then the snow is not pure white. Pure white has no detail. Textured snow is 1 1/3 to 1 1/2 stops lighter. If you open up to 2 stops, your photograph will be too light.
3) If the day is sunny and the snow is in shadows, it can vary up to 1 stop.
4) If the day is overcast, meter the snow and open up 2 1/2 stops.
There are so many approaches to snow photography, use the method that works the best for you.
| 
