|
Portable fuel-burning stoves are all the rage nowadays for hiking and camping. Between fire safety and the lack of available wood in most public camping areas, I
suppose they have their place. But there's a certain mystique about cooking over a wood fire while camping that the little stoves can't duplicate. Besides, it's not really camping
out unless you get smoke in your eyes a couple of times.
First, you have to build a fire and get a good bed of coals. It is the coals that you want to cook over rather than the fire itself. You will get less smoke and 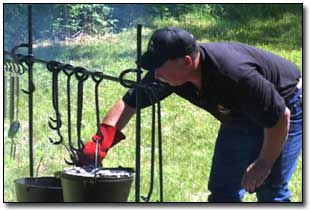 ashes that way, plus the heat is more consistent and controllable and you won't sear off your eyebrows. For the best coals, you should use the densest wood you can find. Oak, cedar, mesquite, pecan, or other hardwoods make good coals, while pines, aspen, and other light woods don't. Before you are ready to cook, you need to build up at least a couple of inches of live coals and then let the main fire settle down
a little.
ashes that way, plus the heat is more consistent and controllable and you won't sear off your eyebrows. For the best coals, you should use the densest wood you can find. Oak, cedar, mesquite, pecan, or other hardwoods make good coals, while pines, aspen, and other light woods don't. Before you are ready to cook, you need to build up at least a couple of inches of live coals and then let the main fire settle down
a little.
Ideally, both for fire safety and convenience, you should dig a fire pit at least 8-10 inches deep and around 2.5 feet square, bigger in both dimensions if you plan on staying a few days or if you plan on having a "bonfire" at night. Keep the dirt you remove in a pile to one side as you'll need it to cover the pit when you leave. There are several designs of fire pits, but the most convenient is the Keyhole Pit. With a Keyhole, you dig a little side chamber out from one edge of the main pit. While the main area is used for the fire itself, the side chamber is used for the actual cooking. The cooking chamber should extend a couple of feet (up wind) from the main fire and should be about a foot wide and only about 4 inches deep. When you're ready to start cooking, just shovel some coals from the fire to the side
chamber.
The two ways to control your heat are to (1) add or subtract coals or (2) raise or lower your cooking pots or pans. I have used multiple cooking chambers before to obtain different cooking temperatures or just to get more cooking surface. It usually takes fewer coals than you might think for most types of cooking, but that's something you just get a feel for after a while. You can use a small grill over the
coals, or you can pre-arrange rocks for the pot to sit on. If you use a grill, it should be easily moved so you can tend the bed of coals. For "car camping" where weight is not such an issue, a piece or two of heavy expanded metal will last forever and is much sturdier than any commercial grill I've ever seen.
One tip to minimize cookware and clean-up is to make some foil dinners before you leave home. These are pre-packaged meals ready to throw in a coal bed for a few minutes of cooking. You start with some heavy-duty aluminum foil, preferably a double thickness about 2 feet square after folding. Then you lay out a piece of meat (anything from ground round to steak) along with some potatoes and veggies like
carrots, onions, or corn and your favorite seasonings. Then fold over the foil and crimp it several times at the seam and at both ends. What you should get is a tightly-wrapped, sealed-off meal inside the foil. Then later, just sprinkle a few coals on the ground and lay the package on top. Then cover with a few coals and wait about fifteen minutes. You can cook baked potatoes the same way but they take a little longer. I must emphasize I said a FEW coals. A little goes a long way, and everyone I know has eaten unrecognizable, charred hunks a couple of times before learning this lesson. When you're through, the fire will eat the foil and all you've got to clean is your fork.
Aluminum and other shiny cookware gets very dirty over a wood fire and is hard to keep from turning a permanent black. Here's a trick to help in that department. Before you put the pot on the fire, make a paste from water and powdered soap. Apply the paste to the bottom and up the sides of the pot. Now start cooking. The soot will all stick on the soap, which washes off very easily when you're through.
Just don't rub the soap off by sliding the pot around on a grill, etc. On frying pans, you need to come up close to the lip with the paste. Just don't get any where it will fall into the food.
If you are car camping, try using a Dutch oven for baking or like a crock pot for stews and such. A true Dutch oven is a cast iron pot with three legs about an inch or two long, and a lid with a lip around the outer edge. Pots with no legs and no lip on the top are called ranch ovens and they are just regular cast iron cookware. Dutch ovens are available in several sizes from most sporting good/camping outlets.
You set them on a shallow bed of coals and then sprinkle more coals on the lid. Just like the foil dinners, you should take it easy on the number of coals you use both underneath and on top. In addition to stews or casseroles, you can bake biscuits or cobblers that always taste better outdoors.
Here's a tip for the care and maintenance of your Dutch oven or any cast iron cookware. After washing, dry immediately. Then use a paper towel to wipe on a thin layer of vegetable oil (no animal fats) inside and out. Then put on the fire (or in a hot oven) for 4-5 minutes. This will cause the oil to glaze and bond to the iron, protecting it from rust and other bad things.
For clean-up at the campsite, I use a couple of 3-4 gallon galvanized buckets. I put these on a grate over the fire till one gets pretty warm. Then I pull it off and leave the other to come to a boil. I put soap in the warm one and use it to wash the dishes. After washing, most everything goes into a mesh laundry bag which is dipped into the boiling water a few times for rinsing. Then that bag goes into a
muslin laundry bag to keep the dust and bugs off while it hangs in a tree and dries. The rinse water can be used as wash water next meal, or both buckets can be saved to drown the fire before filling in the pit.
For fire safety, you should keep the shovel stuck in the pile of dirt removed from the fire pit. Just don't trip on it in the dark. A little folding camp shovel works fine. And you can keep the buckets of wash water for the next meal near the fire pit as well. When you are ready to leave, police the area for trash and throw that into the pit. Then, drown the fire and fill in the fire pit. Remember, a good
camper "leaves no trace".
I hope you have learned how to cook with an open fire while camping and enjoy your next hike into the great outdoors.
| 
