Creating Light Effects Templates With Adobe PhotoshopPhotography and Text By Brandon Batie © All rights reserved.
|
It's seldom when shooting outdoor wildlife images when the light catches the scene just right. Most of us spend more time in programs like Photoshop tweaking photos and making adjustments than we do in the field taking photos. It is for this reason that I have started a lighting templates folder on my hard drive. These templates are grayscale images that can be blended onto a photo image to adjust the lighting or add lighting effects, such as streaks and even fog effects.
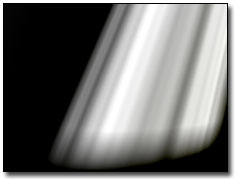 We can add the template image on the right to an image in Photoshop and change the blending modes to get various lighting effects. Using the Screen mode gives us the most natural looking light, while overlay will give us a lot of contrast. We can also change the opacity of the lighting template to make our effect subtler. We can use some of the other modes for wilder effects and even use color templates instead of grayscale for wild lighting and visual effects.
The templates can be useful and time saving for many photographs, but many will require custom effects. To do creative custom effects I will create a new layer and set the mode, usually Screen for the natural lighting. Then I will use the Airbrush with a low flow and opacity to ‘brush' light where I need it using a white paint, or, use a black paint and brush in shadows.
As you can see, there are many ways to skin a cat. The various techniques will give slightly various results. By learning as many as you can it will give you a wide range of effects than can be easily achieved for some very cool effects, and, in the end, some very cool photos.
|
|

