|
It can sometimes seem a bit of a bore to drag a tripod everywhere with you, but if you can be bothered to make the effort, you will almost certainly be able to get better landscape photographs. (Some of the advice here is applicable to other kinds of outdoor photos, but wildlife, sports and macro photography have their own special requirements in which I am no expert!)
A Rule Of Thumb: When You Need To Use A Tripod
The most important function of a tripod is, of course, to hold the camera steady and avoid camera shake (which gives you blurred pictures). Lower light levels mean a longer exposure, so avoiding camera shake is more important in low-light conditions, but there is a useful rule of thumb for deciding when a tripod is essential.
Take the focal length of your lens and use the reciprocal (1 divided by focal length) to determine the maximum safe shutter speed. So, for a 50mm lens, 1/60th should be safe, but for a 300mm telephoto, you should only take hand-held shots at less than 1/300th of a second (although even that will be risky in breezy conditions, with unsteady footing, or with a heavy lens that is hard to hold steady).
Of course, you can increase the aperture (decrease the F number) or increase the ISO to get a shorter exposure, but for most landscape work, you want the maximum depth of field (which means the smallest aperture possible), and the least noise or grain (which means a lower ISO rating).

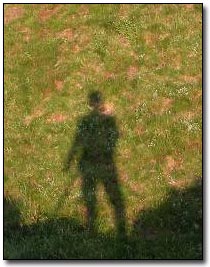
One of those "I could've kicked myself" moments. An early morning trip to the beach was rewarded by an unexpectedly spectacular sunrise - but I didn't have a tripod. Despite leaning against a wall and practicing the tips below, the result was still shaky.
In this detail at actual size, you can see just how blurry the image really is. This was taken at 1/13th of a second, but the lens was zoomed to 40mm, thereby proving the rule!
Some lenses come with VR (vibration reduction; also called IS or image stabilization). That is designed to greatly reduce camera shake, but is outside the scope of this simple article.
What Does It Mean In Practice?
Well, if you are shooting sunlit scenes in the open, you can generally get away without a tripod for wide-angle shots including some sky. But if, like me, you prefer to find more interesting lighting: early morning, late evening, dappled shade, dramatic, stormy skies – then you almost certainly do need a tripod, as you will regularly need long exposures to get the results you want. This is especially true of SLR and medium/large format cameras, whose lenses can be stopped down to much smaller apertures than most point-and shoot or "prosumer" models.
Another Benefit:
Having the camera fixed on a tripod makes it more difficult to take a shot. That might not seem like a benefit at first glance – but it is. Every shot you take requires at least some deliberation, and thus consideration of the scene in front of you in terms of framing and composition. By taking the time to adjust the tripod height, angle or position, you are giving yourself time for reflection.
This is of special benefit to people new to digital cameras, where the tendency is to take 100s of scattershot images (because the "film" is free) in the hope that one will turn out OK. Believe me, you are much more likely to get 100s of mediocre snapshots and a headache from peering at all those images on the computer screen! Far better to make every shot count if you can – the overall quality will almost certainly be higher, and as you frame each one, you will be learning how to make better images.
Choosing A Tripod:
I have two: one is a very heavy, expensive and stable model that will stand up to a gale on a mountain.
 The other is a plastic and aluminum tubing affair with quick-release clips to adjust the height, which weighs hardly anything and only cost me about £15 off the Internet. Guess which one I use? Yes: the one I can carry myself without needing someone as my porter. And a cheap tripod you take with you is far more effective than an expensive one sitting at home in the cupboard!
I hasten to say that this advice is for everyday photographers like me: really serious exponents of the art will of course have the money and stamina to haul much better kit to their chosen locations.
Alternatives – Or When Not To Use Your Tripod:
Sometimes, you may not be able to manage a tripod, for example, if you are standing in fast-flowing water, are in scrubby woodland, or on very steep ground. In that case you may be able to use either a monopod or a beanbag. The technique for a monopod is to use it, and your legs, to form a tripod of sorts. A beanbag allows you to rest the camera safely on a handy rock, branch or fence to give you a bit more stability.
A shutter release cable is also helpful (best in addition to, rather than instead of, a tripod). This minimizes the inevitable "push" you give to the camera when pressing the shutter button.
If you don't have any aids at all, you can minimize blur by various physical techniques:
- Use the neck strap held taut as a brace (wind it around your arm to shorten it first).
- Hold the camera to your forehead.
- Stand with your feet apart or crouch down leaning on a rock etc. Keep your elbows in to your sides.
- Don't breathe or release the button while the shutter is open. (So breathe deeply first and let some air out for comfort!)
- If you can place the camera somewhere, use the auto-timer.
Conclusion:
I hope this practical introduction will be useful: and would like to finish by saying that my own advice would be always to take your tripod and use it whenever you can – regardless of the "rule of thumb"
|

