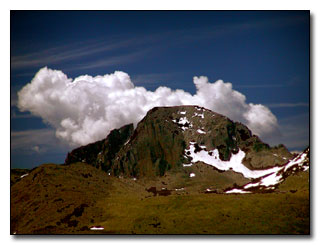
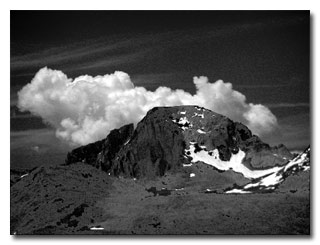
Sometimes you might want to change your photograph to a black & white photograph to give your photograph a totally different look. The following instructions describe how to change your photograph using Adobe Photoshop.
1. Open the file. Choose File --> Open --> Enter the image name.
2. Hold the Ctrl Key down and hit the + key a few times to zoom in the image to a size you need to work with.
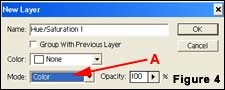
3. Choose Layer --> New Adjustment Layer --> Hue/Saturation and set the Blending Mode to Color. (Figure 4 - A) Click OK.
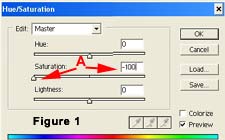
4. Choose Layer --> New Adjustment Layer --> Hue/Saturation and leave the Blending Mode to Normal. Set the Saturation to -100 (Figure 1 - A). Click 'OK'. Now you have two Hue/Saturation Adjustment Layers.
5. Double-click on the layer thumbnail of the bottom Hue/Saturation Adjustment Layer. (Figure 2 - A)
6. The 'Hue' slider is what makes it all happen-move it around to see how the conversion reacts. (Figure 3 - A) You can also boost the saturation to make the effect more drastic.
7. Adjust it to your liking, and you're done! Tweaking the 'Hue' slider results in as if the picture was taken with different color filters.