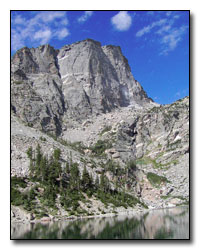
Sometimes the sky does not cooperate when a great photograph opportunity comes by. Using the technique described below will add a vibrant blue sky to your photograph.
How To Apply A Blue Sky To A Section Of Your Photograph>
Note: This technique assumes that there are already clouds in your photograph.
1. Open the file. Choose File --> Open --> Enter the image name to be fixed.
2. Make a luminosity selection by holding the Ctl and Alt key down and clicking the ~ key (located in the top left section of the keyboard under the Esc Key).
3. Make a duplicate copy of the image by either (Ctl+J) or Choose Layer --> New --> Layer Via Copy.
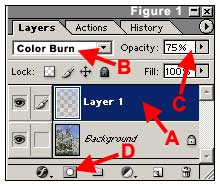
4. Select the new layer (Figure 1 A).
5. Set the new layer's mode Blending Option to COLOR BURN (Figure 1 B) (or MULTIPLY for a less intense effect).
6. Adjust the layer Opacity to suit your taste looking at the sky only (Figure 1 C).
7. Add a LAYER MASK to the new layer by clicking on the the LAYER MASK icon at the bottom of the layers palette (Figure 1 D).
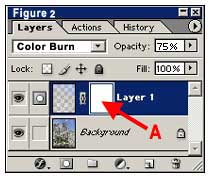
8. With the LAYER MASK still active (Figure 2 A), choose a large soft edged brush (150) set to REDUCED FLOW (25%). Adjust the brush settings to what is needed for your particular situation. Set the color to black and paint slowly over the clouds and the all the areas on the rest of the photograph that are not to be darkened. Change the color to white to correct any area that needs to be darkened again.
9. When you are satisfied with the finished image, save the file.