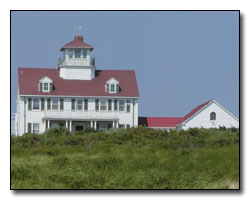
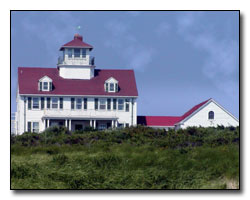
Just because the sky did not cooperate with the moment doesn't mean that the photograph is entirely ruined. With the help of Adobe Photoshop and the cloud filter, it is possible to create an entirely different feeling for your photograph.
How To Add Blue Sky & Clouds
1. Open the file. Choose File --> Open --> Enter the image name to be fixed.
2. Hold the Ctrl Key down and hit the + key a few times to zoom the image to 50%.
3. Select the sky with the magic wand (check the contiguous box and set the tolerance in the range of 22).
4. Choose Layer --> New --> Via Copy. This will create a new layer with just the selected sky selected with the magic wand.
5. Choose Image --> Adjustments --> Variations. Check the midtone box in the right top section of the screen.
6. Click on Add Blue variations as many times as needed by watching the preview screen. Click OK when done.
7. Choose Edit --> Fade Variations. Move the opacity percent to a level that is needed for your photograph.
8. Add a layer mask to the sky and paint a semitransparent mask along the horizon where the blue sky normally fades using a large soft brush set at 40% opacity. This step is optional depending on the type of photograph and whether the sky actually meets the horizon.
9. Choose Filters --> Render --> Clouds. This will add the clouds to the new sky. Make sure the sky layer has been selected.
10. If needed, change the opacity of the new sky layer.